Have you ever sat before your computer late at night and giggled in glee as you blended layers in an imaging editing software? If not, that is probably a good thing. However, as of this week, I can proudly say that I have.

Through my job at the Shapiro Design Lab, I have access to Lynda.com, a professional training service. A subsidiary of LinkedIn, Lynda contains a plethora of training materials, including an introductory course to GIMP (General Image Manipulation Program). GIMP is an open source, free image editing software that allows for high quality photo editing and image creation. Although Adobe suite programs like Photoshop are more powerful, GIMP is an excellent option for dabblers, such as myself. Moreover, many of the functions in GIMP have analogues in Photoshop, making the software great for individuals who are trying to learn but aren’t quite ready to shell out the cash. Taking the Lynda training course on GIMP was an enlightening experience—one I would suggest to others.
I had two major reasons for wanting to learn an image editing software. The first is that my job at the Shapiro Design Lab includes the creation of online content and educational materials. When different projects require icons and logos, it can get pretty challenging to make a quality object with limited image editing skills. The Shapiro Design Lab also has a high end tablet and image editing software in the Perlstein Room, and I would like to familiarize myself more with the different services at the Design Lab. The second is simply that I really enjoy drawing. As a kid, I tried to learn Photoshop from a library book with less than sterling results. I am hoping that by spending some time with GIMP, I can cut my teeth enough to start using professional equipment without getting too frustrated.
I was exceptionally pleased to discover learning GIMP from the Lynda course was significantly easier than I thought it would be. The goal of the course is to provide a comprehensive overview on what tools are available in the software and how to use them. In that regard, the course is incredibly successful. The GIMP course, like others on Lynda, is broken down into chapters covering specific groups of topics, like layers and image manipulation. Each chapter contains short video tutorials on specific tools or functions and an interactive transcript that allows users to jump to specific locations in the video. The course also includes lesson files so learners can follow along with the tutorial. The format of Lynda courses, allow learners to skip between different lessons, stop and start whenever they like, and quickly search individual tutorials for the information they are looking for. However, I found it hard to jump into my own project without finishing the majority of the lessons; I suggest making it through chapter 6 or chapter 7 before starting your own project. With that said, the course was comprehensive and taught me what I needed to know.
Recounting what I learned from the Lynda course would unfortunately take too long, but there are some highlights worth talking about. One of the more interesting aspects of image editing I learned is the nature of destructive and non-destructive changes. Although I had been exposed to the concept of preserving steps in web design, I really hadn’t considered what it looks like in a graphic format. The act of creating art analog style is naturally destructive--if I want to ink this drawing, I can’t return it to a pre-inked state. However, in GIMP, not only can I undo my actions with the undo command, there are different tools worked into the software to preserve different stages of your work. For example, I can use a mask on a specific layer to avoid making any changes to that part of the layer. Moreover, there are almost always different ways to accomplish the same task, some of which are more destructive than others. For example, if I wanted to make an entire photograph various shades of purple, I could change the filter on the photograph itself using the colorization feature, or I could do something less permanent by creating a new purple layer and blending it to the photograph layer. Basically, as a rule of thumb with Gimp, if you are about to do something you can’t easily undo, there is probably another, less destructive way.
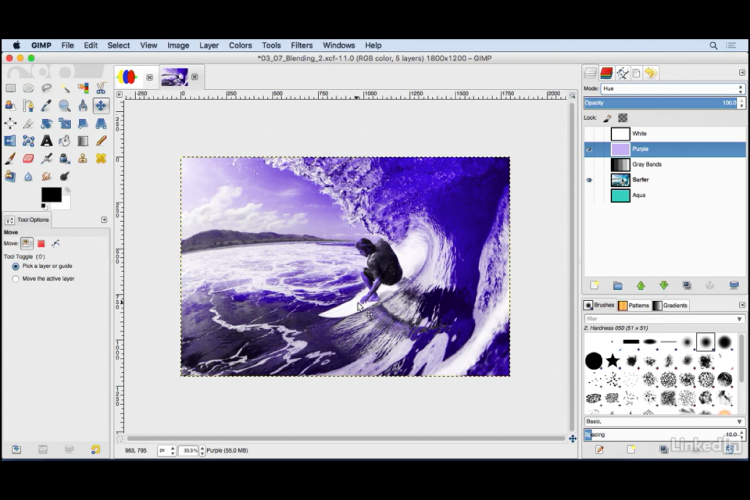
Screenshot of the lesson tutorial for using layer blending. A normal colored image of a surfer has been recreated to purple tones using a purple layer above the image and some special effects.
Hopefully with this blog post I have convinced you to give GIMP a try! As someone who has tried to learn image editing software before, I can assure you that the process is not as difficult as it looks on the surface. All it really takes is some patience and some good video tutorials. If I have not convinced you of that, at least I have told you about the tablet in the Perlstein Room.