As a resident of Open Accessibility here at the Design Lab, I am interested not only in how to make spaces and resources more accessible at our school with the projects I work on, but also how to create workflows for other people – and other schools – to easily follow and do the same for their spaces and resources. The more automated things are, the easier it is for people follow it and do it themselves, especially those who may not have experience or simply do not have the time. So the best way, in my opinion, to bring open accessibility options to the public, is to automate as much of it as possible.
One of the projects I am currently working on in the lab is making tactile maps for buildings. Along with my team, we are taking information of a specific space, and creating a 3-D model out of it. While it would be a great challenge to automate this process for others, given every space has its own unique set of measurements and information, I hope to at least accomplish making the transition of measured information to 3-D model easier and faster, so even those without much 3-D modeling experience can use.
In order to do this, I am learning how to use Grasshopper, a visual programming language and environment that runs within the 3-D modeling software Rhinoceros 3D. Lynda, the online learning platform on software, technology, and more, offers several Grasshopper tutorials, from basics to creating full scripts. With no previous experience in Grasshopper, and limited programming experience in other languages, I have started at the basics. It has taken me through the initiation process, basic commands and tips, and how to start creating my own group of “boxes” (the visual representation of a function in grasshopper).
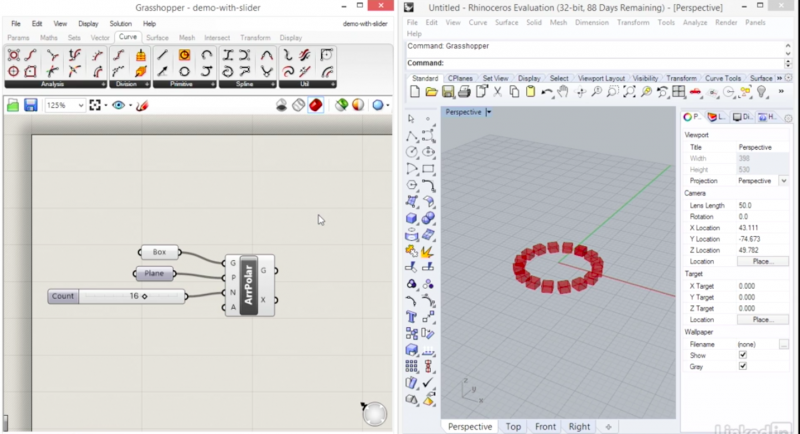
Grasshopper incorporates algorithmic ways of thinking with visuals that make it clear and easy to follow. It allows you to create geometries and relationships between them by inputting parameters and connecting each “box” to create the output you want. You can either create in Rhino and use Grasshopper to control it, or fully create in Grasshopper and use Rhino as the visual.
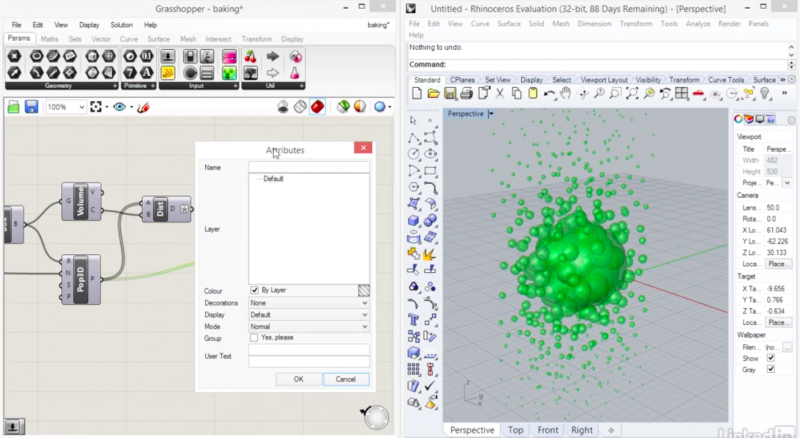
What I found most interesting, and even surprising, is that while what you do in Grasshopper shows up in Rhino at live time, that it is simply a preview of the functions as objects. To actually create the 3-D geometries, you must “bake” you grasshopper geometry into “edible” geometry. While this is done with a simple command, it gives you a lot more control over your creations, allowing you to either change parameters in Grasshopper, or change objects in Rhino. Changing one changes the other, and in real time.
After going through the basic commands, it goes through math and logic functions and more complex geometries. By continuing through this online course, I hope to be able to write my own script using Grasshopper, that will allow people to input parameters or spaces, and receive a sort of mold or object that can be translated into a tactile map. While this is still in a very early stage, I will continue to learn about this way of programming and how to better design tactile maps in order to eventually combine these ideas.